The average home now runs more than 25 connected devices — and in 2026, that number keeps climbing as smart home gear, secondary laptops, and streaming devices multiply. If your video calls freeze, uploads crawl, or your connection drops mid-presentation, the problem is almost never your internet plan. It’s how that plan gets delivered to your desk.
This guide covers every practical lever you can pull to improve Wi-Fi speed for remote work: router settings you can change today, hardware upgrades that actually move the needle, and a clear framework for diagnosing what’s actually wrong before spending money.
Step 1: Diagnose Before You Fix
Most Wi-Fi problems have one of three causes: the router is too far away, the wrong band is selected, or the router hardware is genuinely outdated. Start with a speed test to establish baseline data.
Run a wired speed test first. Plug your laptop directly into the router with an ethernet cable and run a test at fast.com or speedtest.net. This tells you what your ISP is actually delivering. If wired speeds are low, the problem is upstream — your ISP line or the ISP gateway device.
Run a WiFi speed test from your desk. With the laptop back on WiFi, run the same test from the same location. Compare upload and download against the wired result. A 20–30% reduction from wired to WiFi is normal. A 70–90% reduction means your WiFi signal is the bottleneck.
Test at the router location. Run a WiFi speed test while standing next to the router. If speeds jump dramatically compared to your desk, distance and obstacles are the core problem. If speeds are still low next to the router, the router hardware or ISP connection is the issue.
Step 2: Router Placement — Free Fixes First
Router position is responsible for more home WiFi problems than any other single factor. Before changing any settings or buying hardware, move the router.
Place it centrally and elevated. Wi-Fi signals radiate in all directions. A router in a corner bedroom delivers strong signal to that corner and weak signal everywhere else. A router in a central hallway, on a shelf at chest height, reaches more of the home with less signal loss.
Move it away from interference sources. Microwaves, cordless phones, baby monitors, and neighboring routers all compete in the 2.4 GHz band. Keep your router at least 3 feet from other electronics, and avoid placing it inside enclosed furniture or cabinets — the walls absorb signal.
Remove physical obstacles in the direct path. Signal degrades through every material it passes through. Concrete and brick are the worst (8–15 dB loss per wall). Drywall is minimal (3 dB). Water — including aquariums and water heaters — is a signal absorber. One concrete wall between your router and your desk can cut throughput by 60–70%.
Step 3: Choose the Right Band for Your Device
Modern routers broadcast on two or three frequency bands simultaneously. Choosing the right one for your work machine makes a measurable difference.
2.4 GHz — Slower but longer range. Penetrates walls better than 5 GHz. Use it for IoT devices, smart home gear, and any device 50+ feet from the router or through multiple walls. Do NOT use it for video calls or file transfers if you have a 5 GHz option.
5 GHz — Faster, shorter range. Cleaner spectrum with less interference from neighbors. This is the right band for laptops and desktops within 30–40 feet of the router with no more than one wall in between. The correct choice for Zoom, Teams, Google Meet, and any sustained upload or download.
6 GHz (WiFi 6E and WiFi 7 only) — Fastest, shortest range. Nearly zero neighboring network interference because it’s a newly allocated band with few devices on it. Use it for your primary work machine if your router and laptop both support 6 GHz and you’re in the same room or adjacent room as the router. Not worth prioritizing through thick walls.
Practical rule: Connect your work laptop to 5 GHz as the default. Move IoT devices and smart home equipment to 2.4 GHz. If your laptop and router both support 6 GHz and you’re close to the router, use 6 GHz for maximum stability on calls.
Step 4: Optimize Router Channel Selection
Within each frequency band, routers broadcast on specific channels. Neighboring networks on the same channel compete directly for airtime — this is one of the most common causes of slow speeds in apartments and dense neighborhoods.
Check your current channel using a free analyzer. On Android, Wi-Fi Analyzer (VREM Software) shows all nearby networks and which channels they occupy. On macOS, hold Option and click the WiFi icon in the menu bar, then choose “Open Wireless Diagnostics” and use the Scan utility. On Windows, use the NetSpot free tier or the built-in netsh wlan show all command.
Switch to a less congested channel manually. Log into your router admin panel (typically 192.168.0.1 or 192.168.1.1) and navigate to the Wireless settings:
- For 2.4 GHz: Only channels 1, 6, and 11 are non-overlapping. Pick whichever of those three has the fewest neighbor networks on it. Never use channels 2–5 or 7–10 — they overlap with two adjacent channels simultaneously.
- For 5 GHz: Channels in the 36–64 and 100–165 ranges are all non-overlapping. Pick the channel where you see the fewest neighbor networks.
- For 6 GHz: Essentially no competing networks in most locations. Auto channel selection works well here.
Widen your channel bandwidth. In the same router admin panel, find the channel bandwidth setting. For 5 GHz, change from 20 MHz to 80 MHz if the option is available. This quadruples the bandwidth available for your connection. Be aware: very congested areas can see worse performance with wider channels because more neighboring traffic falls within the channel. Test before committing.
Step 5: Set Up QoS for Video Calls
Quality of Service (QoS) tells your router to process packets from specific devices or applications before others. When your household internet connection is contested — kids streaming, someone gaming, background cloud backup running — QoS keeps your video call smooth.
Access QoS through your router admin panel:
- Log into your router (192.168.0.1 or 192.168.1.1 are the two most common defaults)
- Find the QoS, Traffic Priority, or Bandwidth Control section
- Locate your work computer by its MAC address or hostname (find your MAC address under Network Settings on your machine)
- Set it to “High Priority” or the highest tier available
- Save and apply — no restart required on most routers
On TP-Link routers: Use the Tether app or web interface. Navigate to Advanced → QoS. Enable it and add your device with High priority.
On ASUS routers: Navigate to Adaptive QoS. Enable “Bandwidth Prioritization” and drag your work device to the top of the priority queue.
Critical note: QoS manages your upload queue, not your download. Most video call problems are upload-limited. If your ISP plan has asymmetric speeds (e.g., 500 Mbps down / 20 Mbps up), no amount of QoS fixes the 20 Mbps upload ceiling — you need a plan upgrade for that.
Step 6: Bypass the ISP Gateway
The combo modem/router gateway that ISPs rent to subscribers is almost universally a limitation. These devices prioritize cost over performance and often run outdated firmware that ISPs never update. Bypassing it and using your own router eliminates this bottleneck.
How to put the ISP gateway in bridge mode:
- Call your ISP or log into the gateway admin panel and enable “Bridge Mode” or “IP Passthrough”
- This turns the ISP device into a pure modem — it handles the WAN connection but stops routing and broadcasting WiFi
- Connect your own router to the gateway via ethernet
- Your router now handles all routing, DHCP, and WiFi for the home
What to expect: Users who bypass ISP gateways consistently report improved throughput consistency, lower latency, and better behavior under load. The ISP gateway is a particularly frequent bottleneck for cable internet customers (Xfinity, Spectrum, Cox).
Check if you own or rent. If you rent the gateway, bypassing it still costs the rental fee (~$10-15/month). Consider purchasing a compatible DOCSIS 3.1 modem (Motorola MB8611, Arris S33) to own your equipment and eliminate the rental charge — most customers recoup the cost within 18 months.
Step 7: Update Firmware
Router firmware updates fix security vulnerabilities, improve radio driver performance, and occasionally deliver meaningful speed improvements. Most routers ship with outdated firmware from the factory.
Check and update immediately after setup. Log into the router admin panel, navigate to Administration → Firmware Update (exact path varies by brand), and install any pending updates. Restart the router after updating.
Enable automatic updates if available. TP-Link and ASUS both offer automatic firmware update options in their admin panels. Enable this so your router stays current without manual intervention.
Realistic expectations: Firmware updates typically improve stability and fix specific bugs rather than dramatically increasing throughput. The exception is routers that launched with known driver issues — some WiFi 6 routers shipped in 2020-2021 with firmware that limited MU-MIMO performance, and updates later in the product lifecycle restored proper behavior.
When to Add Hardware
If the steps above don’t solve the problem, hardware is the answer. Here are the three scenarios and the right fix for each.
Scenario 1: Your Router Is the Bottleneck (Upgrade It)
If your router is more than 5 years old, or if it’s a WiFi 5 (802.11ac) router, it’s likely limiting your home network regardless of what your ISP plan delivers. WiFi 6 and WiFi 7 handle concurrent device connections fundamentally differently — the improvement under load is significant in households with 15+ active devices.
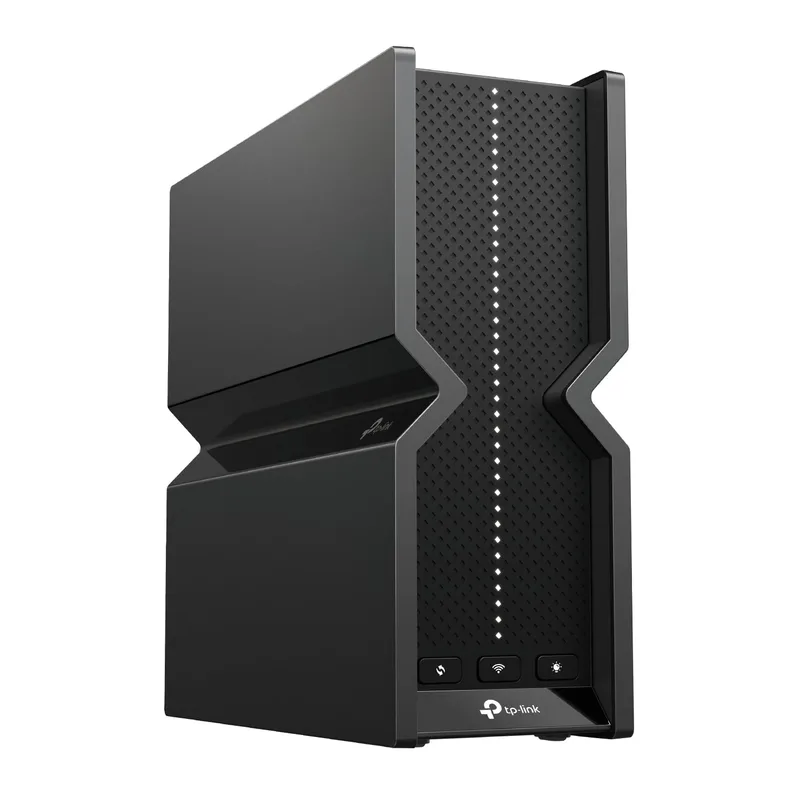
TP-Link Archer BE550 WiFi 7 Router
Pros
- WiFi 7 Multi-Link Operation (MLO) dramatically reduces video call drops when household bandwidth is contested
- 2.5G WAN port is ready for multi-gig ISP plans rolling out across major metro areas in 2026
- EasyMesh support lets you add satellite nodes later without replacing the whole system
- HomeShield QoS lets you prioritize specific devices and applications directly from the Tether app
- Under $190 makes it the best-value WiFi 7 router on the market right now
Cons
- LAN ports cap at 1G — add a 2.5G switch if you're running a NAS or high-throughput desktop
- Single-unit coverage (~2,500 sq ft) struggles with large homes or concrete wall construction
- No dual-WAN for ISP failover — step up to the ASUS RT-BE96U if automatic failover is required
The TP-Link Archer BE550 is the right upgrade for most home offices in 2026. WiFi 7 Multi-Link Operation (MLO) maintains stable call connections even when other household devices are actively competing for bandwidth — the practical benefit is fewer dropped frames on video calls during peak household usage. At under $190, it’s the first time WiFi 7 has been accessible without a premium price tag.
Scenario 2: Your Home Office Is Too Far From the Router (Extend Coverage)
If speed tests confirm strong performance near the router but weak performance at your desk, you have a coverage gap. The two solutions are range extenders (simpler, cheaper) and mesh nodes (more seamless, more expensive).
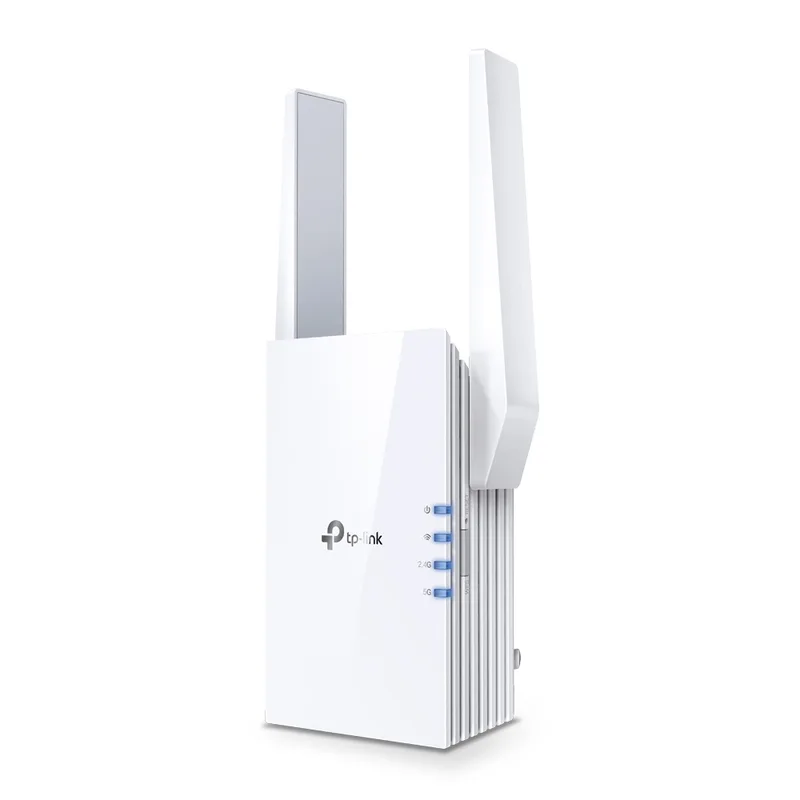
TP-Link AX3000 WiFi 6 Range Extender (RE705X)
Pros
- OneMesh mode with compatible TP-Link routers creates a unified network with seamless roaming — no separate SSID to manage
- Access Point mode is the cleaner option when you can run ethernet from the router to the extender location
- Gigabit ethernet port lets you wire a desktop or dock at the extended location for best-of-both performance
- WiFi 6 (OFDMA + beamforming) handles up to 64 simultaneous device connections without the bandwidth collapse of older extenders
Cons
- Wireless extender mode adds latency on each hop — use AP mode with an ethernet backhaul if possible
- No 6 GHz band — if your router already supports 6 GHz, you lose that band at the extended location
- Single-unit coverage is adequate for most rooms but a mesh system (Deco, eero) is better for whole-home coverage
The TP-Link RE705X splits the difference: it’s a WiFi 6 extender with a Gigabit ethernet port and OneMesh support for compatible TP-Link routers. In OneMesh mode, it creates a single unified network with your router — no separate SSID, automatic device roaming. In standalone Access Point mode (when you can run ethernet from the router to the extender location), it delivers the reliability of a wired access point without the extender latency penalty.
Mesh vs. extender: Range extenders in wireless mode add latency because they receive and re-broadcast the signal on the same radio. A mesh system with a dedicated wireless backhaul or wired backhaul is better for seamless roaming. If your budget allows and you have multiple coverage gaps, a mesh system like the eero Pro 6E or TP-Link Deco BE65 is the cleaner long-term investment. For a single room extension, the RE705X at $79–$99 is the practical choice.
Scenario 3: You Can’t Run Ethernet and Need Wired-Quality Stability
Running a Cat6 cable from your router to your desk is the ideal solution — one cable, permanent fix, no hardware to maintain. But in apartments, rented spaces, or homes where cable runs aren’t feasible, powerline adapters deliver wired-quality speeds through existing electrical wiring.
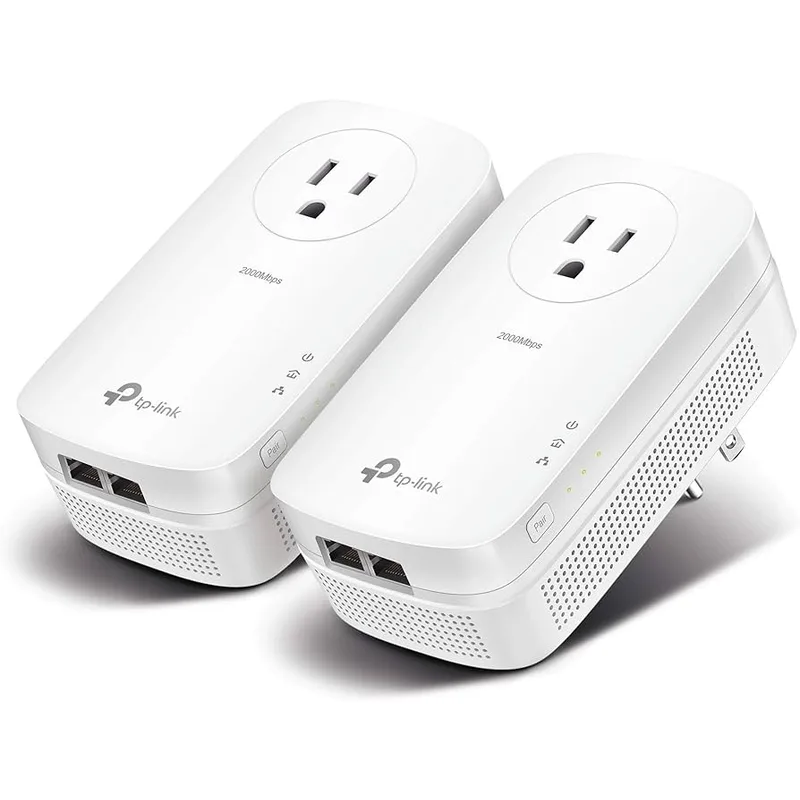
TP-Link AV2000 Powerline Adapter Kit (TL-PA9020P KIT)
Pros
- Uses existing electrical wiring — no cable runs required, just plug into any outlet on the same circuit
- Gigabit ethernet ports on each adapter provide wired-quality stability for desktops and docks
- AC passthrough outlet means you don't sacrifice the socket where the adapter is plugged in
- More stable and lower-latency than WiFi from two rooms away — meaningful improvement for sustained upload tasks
Cons
- Real-world throughput (150–400 Mbps) is lower than the theoretical 2000 Mbps figure; varies significantly by wiring age and circuit distance
- Only works on the same electrical circuit — outlets on different breakers may not pair reliably
- Powerline performance degrades when high-draw appliances (HVAC, dishwasher) cycle on the same circuit
The TP-Link TL-PA9020P KIT uses your home’s electrical wiring to carry ethernet signal between two adapter units. Real-world throughput varies by wiring age and circuit distance, but most users see 150–400 Mbps with latency in the 2–5ms range — far more consistent than WiFi from two rooms away. The passthrough AC outlets mean you don’t lose a socket where the adapters are installed. For desktops, docked laptops, and anyone who can’t justify a full ethernet run, this is the practical alternative.
Important limitation: Both adapters must be on the same electrical circuit (same breaker). If your desk outlet is on a different circuit from your router, the adapters won’t pair. Test this by temporarily running an extension cord on the same circuit before purchasing.
Product Comparison
| Product | Type | Price | Best For |
|---|---|---|---|
| TP-Link Archer BE550 | WiFi 7 Router | $170-$190 | Router upgrade for all-home improvement |
| TP-Link RE705X | WiFi 6 Extender | $79-$99 | Extending coverage to a specific room |
| TP-Link TL-PA9020P KIT | Powerline Adapter | $99-$119 | Wired speeds without running cables |
Buying Guide: What to Prioritize
Solve placement before buying hardware. A $15 ethernet cable from router to desk produces more improvement than a $300 mesh system installed in the wrong location. Exhaust the free and cheap fixes first.
Match your router to your ISP plan speed. A gigabit internet plan paired with a WiFi 5 router delivers WiFi 5 speeds. A gigabit plan paired with a WiFi 7 router delivers WiFi 7 speeds. If you’ve upgraded your internet plan recently and haven’t upgraded your router, the router is the limiting factor.
Upload speed matters more than download for calls. Zoom, Teams, and Meet all require stable upload. Check your plan’s upload speed specifically — a 1 Gbps download plan with 20 Mbps upload will still stutter on video calls if everyone in the house is uploading simultaneously.
Extenders degrade under load. Range extenders in wireless mode consume half their bandwidth receiving the signal and the other half rebroadcasting it. Under light use, the performance hit is tolerable. Under household load (multiple concurrent video calls, streaming, cloud sync), the performance collapse is severe. Wired access points or mesh systems with dedicated backhaul avoid this problem.
Frequently Asked Questions
Why is my Wi-Fi slow during business hours but fast at night?
Two likely causes: ISP congestion and household usage patterns. ISPs oversell capacity in residential areas, and daytime congestion — especially mid-morning and around noon — can reduce real-world speeds by 20–50% below your plan’s rated speed. You can verify this by running speed tests at 9am vs. 11pm and comparing. The other cause is household usage: more devices are active during work hours (streaming, smart home activity, background updates). QoS and channel optimization help on the household side; only an ISP plan upgrade or switching providers fixes ISP-side congestion.
Should I use 2.4 GHz or 5 GHz for video calls?
5 GHz for video calls, always. The 2.4 GHz band is shared with Bluetooth devices, microwaves, baby monitors, and dozens of neighboring networks — interference and congestion are structurally worse. 5 GHz has a shorter range but dramatically less interference, and the throughput it provides (typically 200–600 Mbps at close range) is far more than any video call requires. If your laptop’s network adapter has a band preference setting, lock it to 5 GHz for your work network.
How do I know if my router is the bottleneck?
Plug a device directly into the router via ethernet and run a speed test. If wired speeds match your ISP plan, the router is working correctly and the problem is WiFi delivery. If wired speeds are significantly lower than your plan, check that your router’s WAN port supports your plan speed — older routers with 100 Mbps WAN ports bottleneck gigabit plans regardless of WiFi generation. Also verify no devices are consuming bandwidth in the background (check connected devices in the router admin panel).
Does the ISP-supplied gateway limit my speeds?
Frequently yes. ISP gateways are designed to a cost target and often run outdated firmware. For cable internet customers (Xfinity, Spectrum, Cox), the ISP gateway is a common source of inconsistent performance under load. Putting it in bridge mode and using your own router typically improves performance, especially in multi-device households. The improvement is most pronounced on older gateways (5+ years) and plans with speeds of 500 Mbps or higher where the gateway hardware becomes the limiting factor.
Is Wi-Fi 7 worth upgrading to in 2026?
For a new router purchase, yes. The TP-Link Archer BE550 brought WiFi 7 under $190 — there’s no longer a meaningful cost premium over comparable WiFi 6E hardware. Multi-Link Operation (MLO), which lets devices connect simultaneously on two bands, is a genuine improvement for video call stability under household load. The 6 GHz band adds a near-interference-free channel. If you’re replacing a WiFi 5 or older router, skip WiFi 6 and buy WiFi 7 directly. If your WiFi 6 router is working reliably, keep it — the improvement from 6 to 7 is meaningful but not urgent.
Conclusion
Most home office Wi-Fi problems are fixable without buying anything: move the router, switch to 5 GHz, change channels, enable QoS, update firmware. These steps take under an hour and solve the majority of reported speed issues.
When hardware is genuinely the problem, the path is clear: upgrade to WiFi 7 (Archer BE550) if your router is outdated, add the RE705X if a single room has coverage gaps, or use the TL-PA9020P KIT powerline adapters if running ethernet cable isn’t an option.
For a complete networking setup — routers, mesh systems, ethernet switches — see our Best Routers for Home Office in 2026, Best Mesh WiFi Systems for Remote Workers, and Wired vs Wireless for Home Office guides.
Detailed Reviews
TP-Link Archer BE550 WiFi 7 Router
Pros
- WiFi 7 Multi-Link Operation (MLO) dramatically reduces video call drops when household bandwidth is contested
- 2.5G WAN port is ready for multi-gig ISP plans rolling out across major metro areas in 2026
- EasyMesh support lets you add satellite nodes later without replacing the whole system
- HomeShield QoS lets you prioritize specific devices and applications directly from the Tether app
- Under $190 makes it the best-value WiFi 7 router on the market right now
Cons
- LAN ports cap at 1G — add a 2.5G switch if you're running a NAS or high-throughput desktop
- Single-unit coverage (~2,500 sq ft) struggles with large homes or concrete wall construction
- No dual-WAN for ISP failover — step up to the ASUS RT-BE96U if automatic failover is required
TP-Link AX3000 WiFi 6 Range Extender (RE705X)
Pros
- OneMesh mode with compatible TP-Link routers creates a unified network with seamless roaming — no separate SSID to manage
- Access Point mode is the cleaner option when you can run ethernet from the router to the extender location
- Gigabit ethernet port lets you wire a desktop or dock at the extended location for best-of-both performance
- WiFi 6 (OFDMA + beamforming) handles up to 64 simultaneous device connections without the bandwidth collapse of older extenders
Cons
- Wireless extender mode adds latency on each hop — use AP mode with an ethernet backhaul if possible
- No 6 GHz band — if your router already supports 6 GHz, you lose that band at the extended location
- Single-unit coverage is adequate for most rooms but a mesh system (Deco, eero) is better for whole-home coverage
TP-Link AV2000 Powerline Adapter Kit (TL-PA9020P KIT)
Pros
- Uses existing electrical wiring — no cable runs required, just plug into any outlet on the same circuit
- Gigabit ethernet ports on each adapter provide wired-quality stability for desktops and docks
- AC passthrough outlet means you don't sacrifice the socket where the adapter is plugged in
- More stable and lower-latency than WiFi from two rooms away — meaningful improvement for sustained upload tasks
Cons
- Real-world throughput (150–400 Mbps) is lower than the theoretical 2000 Mbps figure; varies significantly by wiring age and circuit distance
- Only works on the same electrical circuit — outlets on different breakers may not pair reliably
- Powerline performance degrades when high-draw appliances (HVAC, dishwasher) cycle on the same circuit